Tuesday 31 July 2012

Goodie Bag Swap

I altered this paper bag for a swap I am doing with a dear scrappy friend.  She loves vintage/shabby chic so I embellished the goodie bag as close to her liking as possible.  I love how the bag turned out!  I can now safely post the pictures of it too because she has just received it in the mail.

There are many embellishments on this glassine wax type bag and it is such a super size so I could fill it with awesome goodies


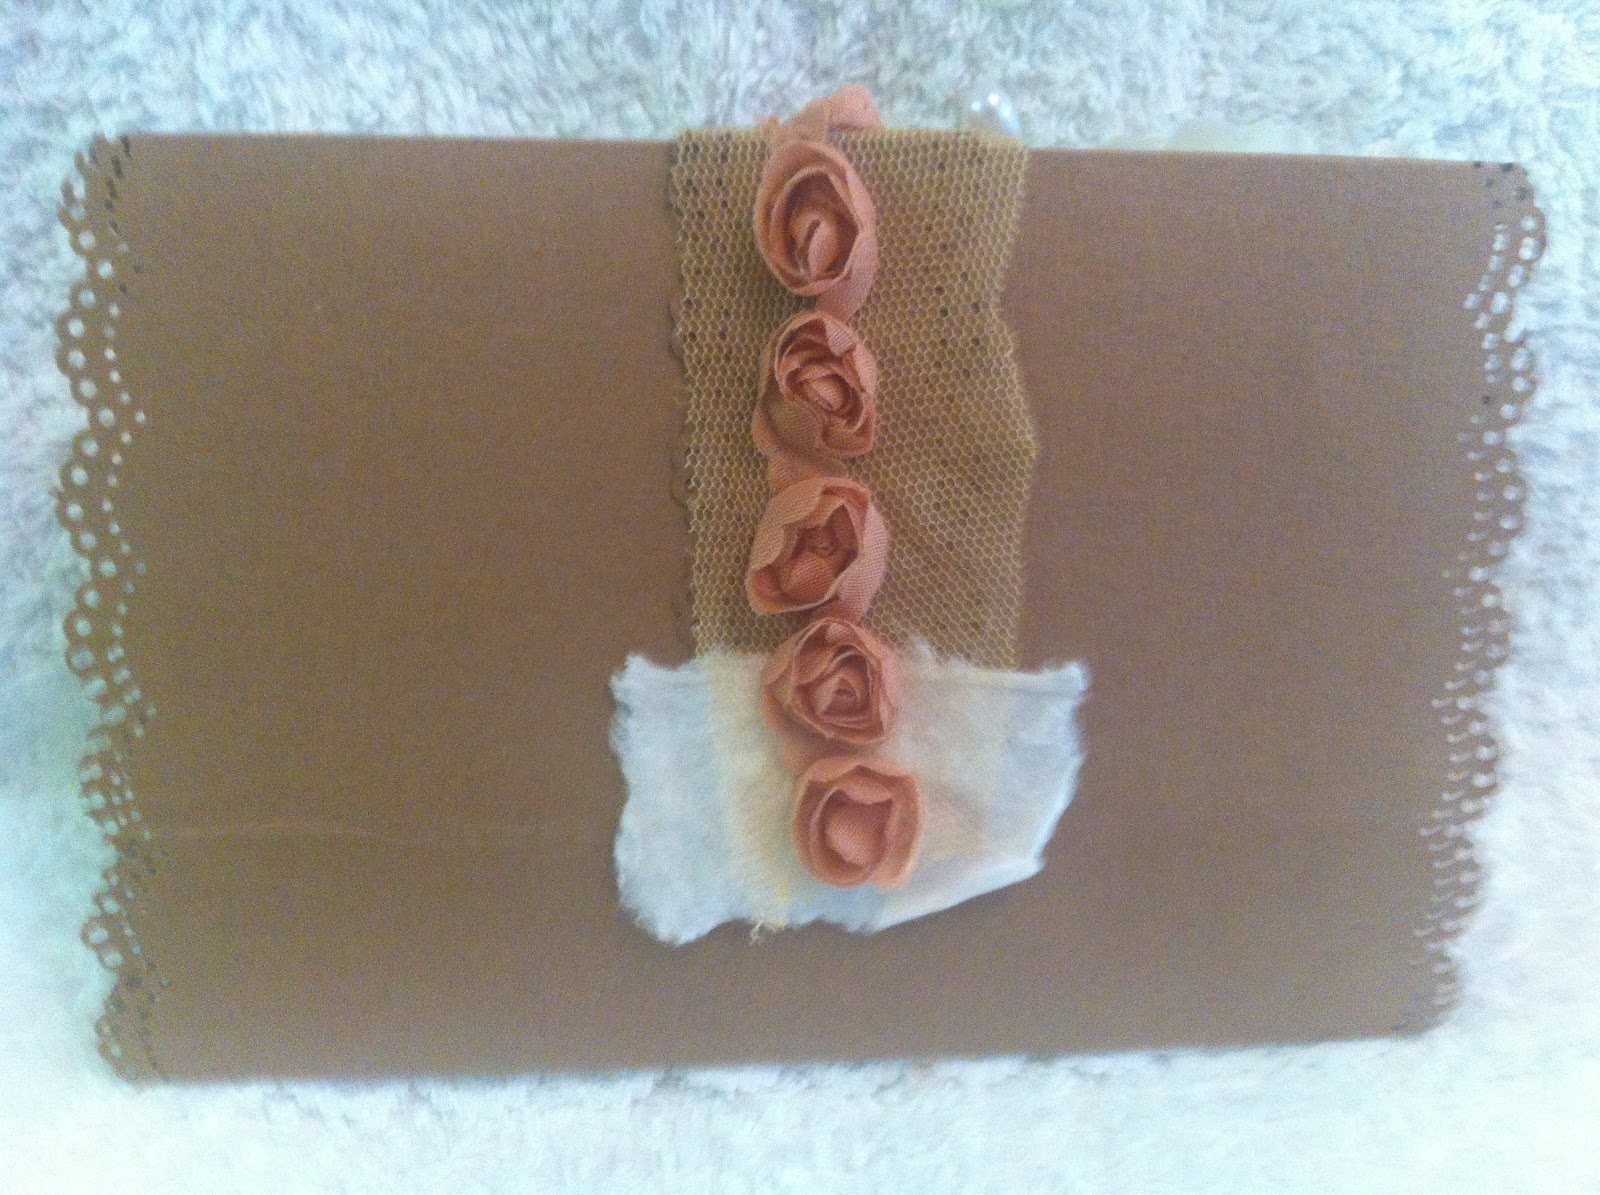
First I stamped the front of the bag with a script stamp and inked the edges with distress ink.  I punched holes on the top so I could loop some WOC vintage seam binding.  I cut a square of brown paper, used a Martha Stewart punch on the edge and adhered it to the front of the bag. I layered some Pion papers with distressed edges on the top of that.


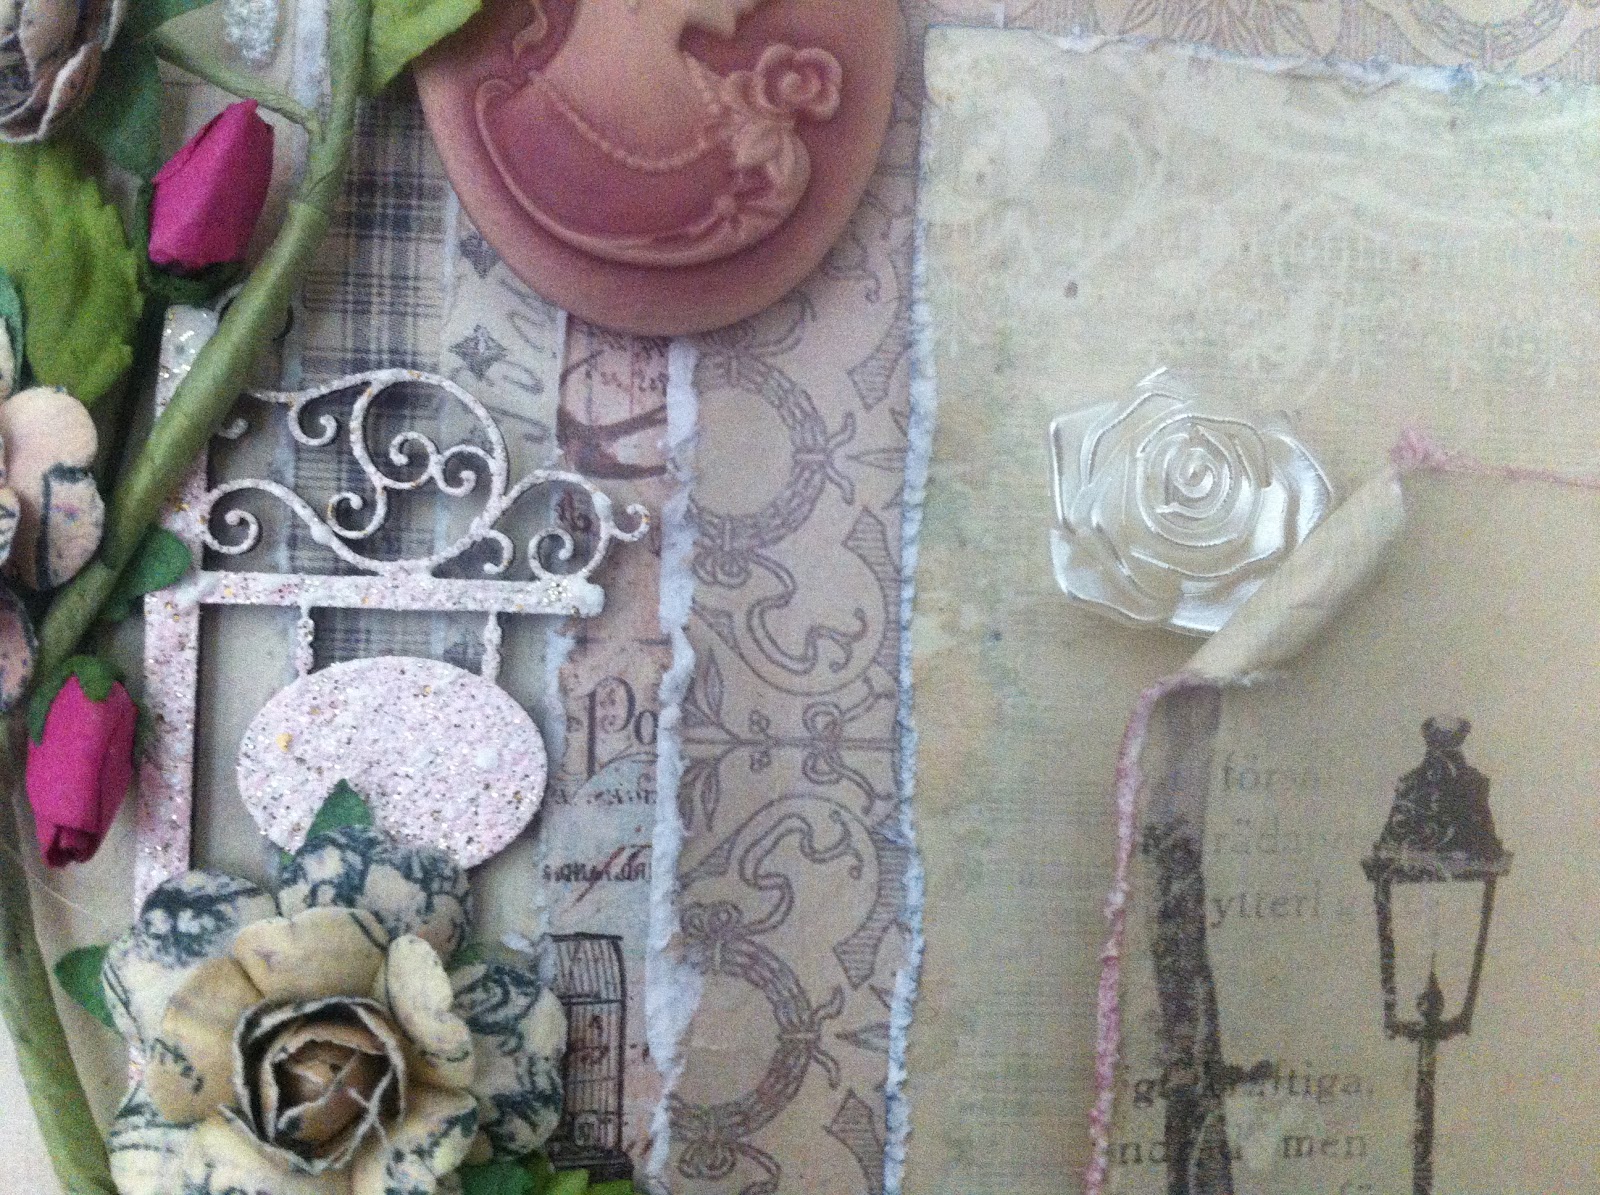
The above image shows off beautiful vintage lace that is an off white almost ivory shade.  The circle image is by Pink Paislee - the London Market collection; fits with the Pion papers perfectly.


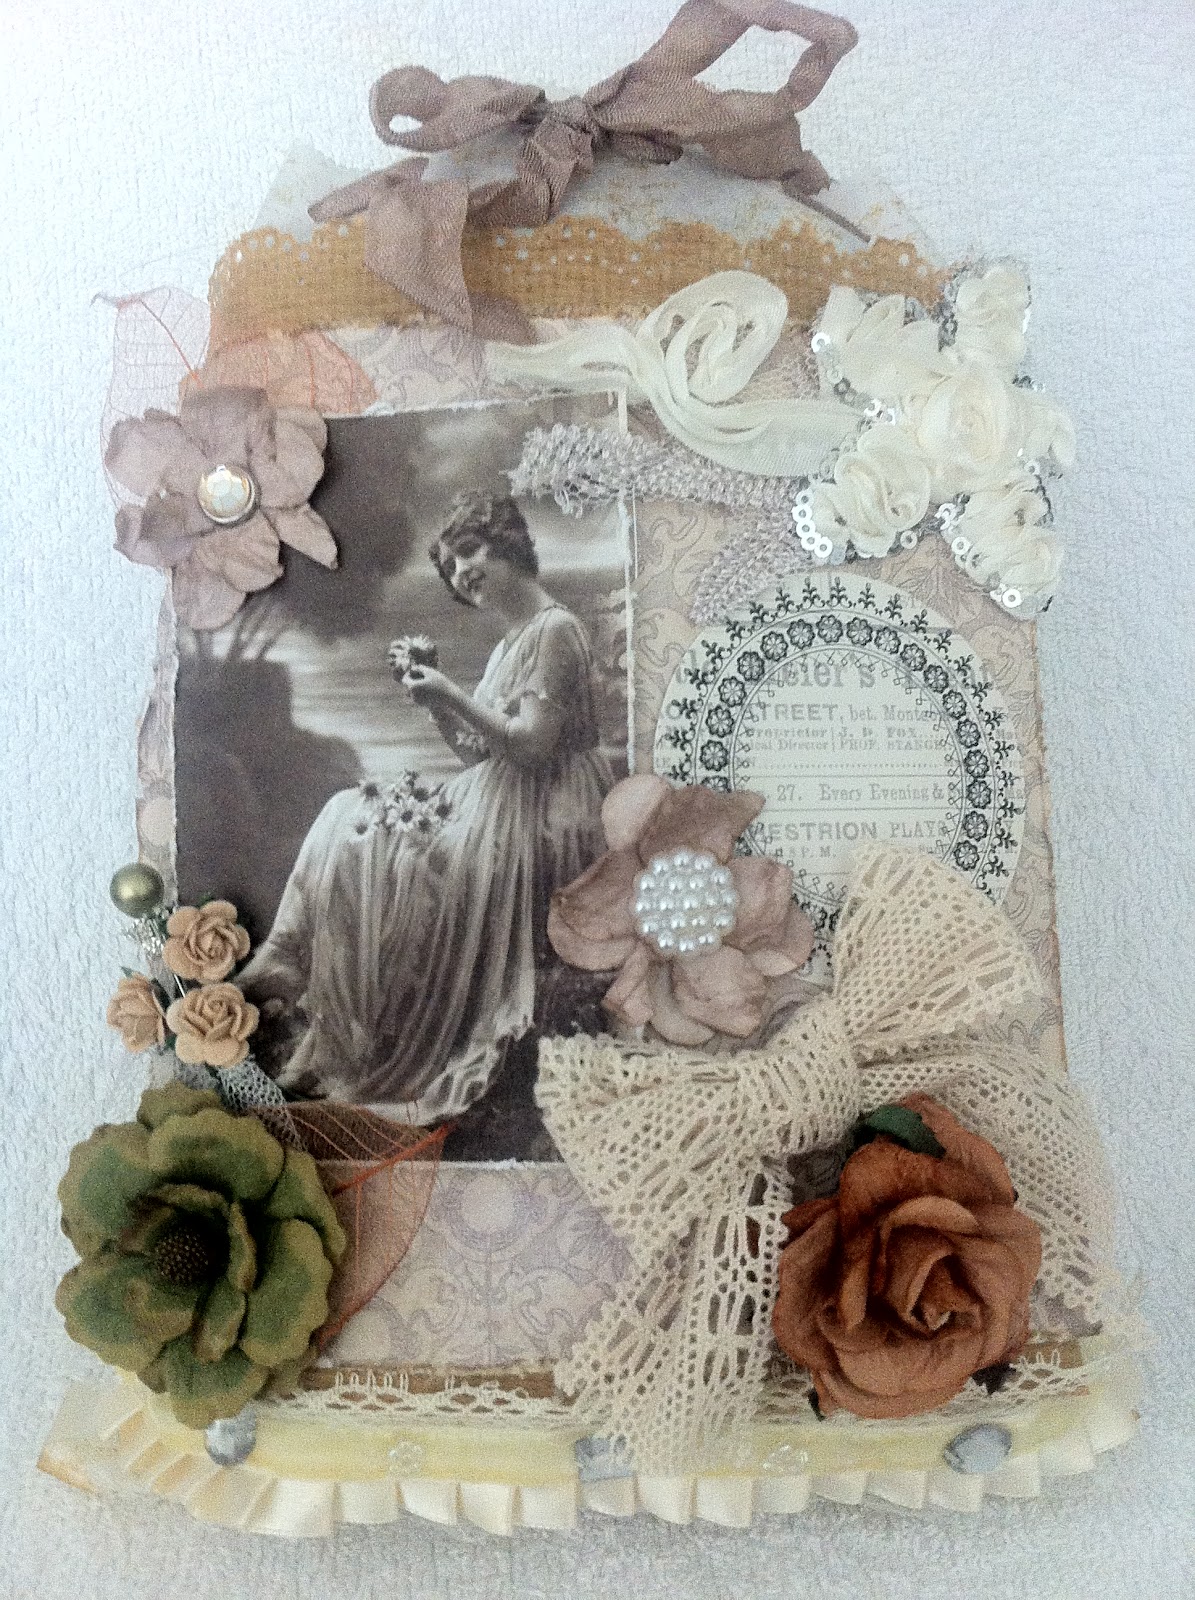
The vintage lady in the above image is also from Pion Papers with WOC roses and stick pin.  The skeleton leaf is from IAR and the green flower from Prima flowers.  Lace trim on the edge of the bag was bought at a local supplier.

Another IAR skeleton leaf with some IAR flowers and a brad from my stash.  How gorgeous is that vintage lady!!


Another IAR flower with a pearl centre.  The beautiful brown rose is also from IAR and the bow is lace from my stash - that was the last bit of lace in that style and the length created a perfect bow - I love using that lace when crafting in vintage style!!


A close up image of the different embellishments in the centre of the bag.


I covered the goodies in the bag with a couple of beautiful rose pattered serviettes which can in turn be used to decoupage and/or mod podge onto a project.


Side views of the goodie bag.


The back of the bag - as you can see I scatter stamped butterfly images all over it.

This view shows the bulge the bag caused because all the yummies inside.

For this goodie bag swap we had to fill the bag with 5 new scrapbooking items and 5 items from our stash.  I added some extra goodies - why not???  A goodie bag should be filled with treats and surprises :-)

I am always happy to do a swap so let me know if you want to participate in one with me.  This swap is with a lady who lives in Holland so yeah I especially love doing international swaps because you get some yummies you cannot find in your own country!!

I have also started a Dubai Secret Sisters Swap Group - so if you are from Dubai or anywhere else in the UAE and want to join in just click the request to join button.  See the link on the side of my Facebook Profile.

Thanks for stopping by and please do leave a comment...

Wednesday 18 July 2012

Pion 12x12 Layout

I took my time to make this layout and I loved how it turned out.  What better combinations than Pion  Prima, WOC, Iamroses, Melissa Francis, Dusty Attic and of course, luscious vintage laces from my stash!  

There is little else to say...the images speak for themselves...enjoy!


Please leave a comment or email me if you have questions on any of the products on this layout.

Thanks for stopping by...

Shabby Chic Wallet Style Card

Hey browsers; welcome to my blog ...

Today I share another shabby chic card; this time in a wallet style.  I love this card because I used beautiful off white mulberry paper.  I love working with mulberry paper and it is so easy to tear and leaves that great tattered edge that is so appealing when creating shabby chic style.

As you can see simple yet elegant.  Mulberry paper torn to fit cardstock panels and layered lace with lace flowers, roses and pearls


A pearl centre in a paper rose layered on a vintage lace flower.  A stick pin embellishes the artificial rose beautifully.


The cardstock is cut into a V shape and inserts into a slit in the mulberry paper and this of course, is the closure of the wallet.  A creme bow discreetly covers the slit in paper. 


The brown rosette trim is by WOC and so is the binding I used for the bow. 


The inside of the card!   Easy to insert a note or gift card etc.


A Petaloo mulberry flower and a bow tied with pale material.  I used the doily punch by Martha Stewart on the outside of the card.


As you can see the back of the card is just as simple - plain and elegant.  My father always said that simplicity is the essence of good taste!

So there you have it; try one for yourself.  Julianna has a tutorial on how to make this card - she is awesome people!  Her talent is amazing and one cannot help but be inspired by her!

Thanks for stopping by and please leave a comment...

Tuesday 17 July 2012

Mixed Media Canvas

My love for mixed media and canvas projects has grown considerably over the past few months.  I am still very much a novice so I practise often, try proven techniques and new ideas all the time. 

I quite like how this canvas turned out and look, the images has found its way to my blog...


The buildings I cut with my Cameo and used them as a stencil. I used various distressed inks for colour.


Torn strips of canvas, cloud silhouettes cut with my Cameo and glimmer mists make these clouds.


A Tim Holtz birdcage and creme de chocolat glimmer mist for this image - see how the bird is free from the cage?!


An embossed Dusty Attic lamp post and Cameo cut leaves create this section of the canvas - I cut the leaves from green cardstock and also applied apple gliimer mist with a paint brush for added colour.


 In the image below do you notice the picket fence against the wall??  This is also a die cut and I arranged the flowers against the fence against the wall - thought that was kinda cute !


The above image has quite a few bits and pieces...flowers & toadstools were fussy cut from freebies in a craft magazine, dandelions cut with Cameo, brown and orange flowers from my stash, stunning green lace from Paperlane.  The butterfly was fussy cut from Pink Paislee's Spring Jubilee paper collection. 


All the above products with the exception of the freebie are all available from Paperlane including the Cameo Sillouette machine.  They have an awesome store filled with a variety of products bound to satisfy even the most discerning shopper.

Hope you like the canvas! 

Thanks for stopping by and please do leave a comment.

Monday 16 July 2012

Shabby Chic Tags

Shabby chic is one of my favourite styles to scrapbook with.  My sister loves reading and more often than not she is reading more than two books at a time.  In this post I share two tags I made for her; one in  shabby chic colours and the other in lavender purple tones ...


I used the Pretty in Pink paper pad by Glitz - super gorgeous paper!  I made most of the flowers on this tag and there are also some WOC and Prima roses. 


I made the two flowers with the pearl centres - 1 with a throw away top I had and the other with string!  Love how they turned out!


Lace inserted under the rosette - I coloured the white rosette with creme de chocolat glimmer mist diluted with water.  The little flower is a sweetheart blossom by WOC.


Layered lace under the flowers and added a Prima rose on a mulberry flower also coloured with diluted creme de chocolat glimmer mist!  The swirls are stamped and then embossed.


I love making these hearts with craft wire!  Pink pom pom wool forms parts of the fibres I threaded through the eyelet on the pink tag.  I made the stick pin and the material flower.  


I used Prima Meadow Lark papers for this tag - chose neutral patterns and tones to highlight the net type of material used to create a pocket.  The flower is pretty gorgeous and the heart string is a favourite of mine!  Again I used wool and fibres along with a shoe charm - my sister loves shoes!!


I made a rosette from dark mauve ribbon and glued it down over the centre of the eyelet.  Two lavender artificial roses alongside the rosette and a Prima button to finish it off.  This swirl is stamped with aged mahogany distressed ink. Corner stickers from my stash.


Front (top image) and back (bottom image) of tags


So go ahead and make your own tags - its super easy and fun to make!!

Thanks for stopping by people and please do leave a comment!!!