Wednesday, 17 April 2013

Dubai Word Book

Hey hey scrappy friends...here is a fun project I wish to share with you!

This DUBAI word book with awesome matching themed papers is designed and sold by Paper Lane. The decorative matching 12x12 papers depict watermarks of all the famous landmarks and tourist attractions of Dubai.  They are pretty awesome with tones of blue, gold, red and greens; double sided and lovely to work with.  

So without further blabber, let me show you how I decorated the word book:


The image above shows the book at a glance. I mostly chose blue as my base colour to decorate the chipboard pages. Dubai is always summery and what better way to decorate than to depict that. Sunflowers throughout reflect the sun and lots of colour in flowers to portray summer and fun in the sun!


On the cover and D of Dubai I coloured a chipboard palm tree and camel with distress inks; added some bright sunny flowers, ribbons, fibres, charms and edged the chipboard with gold glitter.


On the reverse side I made a little envelope held together with a green mini peg; it opens up to reveal a journaling spot.  The mini envelope is only glued down a the top so trip paraphernalia can be inserted under the envelope.


I love this page! On the page I stenciled a sun with glimmer mist. before decorating.  The red paper on the die cut is also from the Dubai paper collection. What is Dubai without a palm tree!!


This is my favourite page! I fussy cut the camels from a page in the collection, highlighted the gold on the camels with glitter and only glued down the sides so it is easy to slide photos behind the camels. The dark reddish scalloped shape helps to reflect the night in a desert sky. I could not resist the silver moon in the corner. I bought 3 decorative camels at a tourist kiosk and ladies...how cute are they!!


The image above shows all the fibres and ribbons I knotted around the binding rings. I chose colours that are scattered throughout the book and added the green and red ribbon to reflect the national colours of Dubai. Of course who can resist adding the Burj Al Arab keyring found all over!.

Ladies this makes an awesome gift for family and friends who come to visit. I will be using this book to record photo's of my sister's visit last year. So pop into the store, buy the book and the papers and do it...it is easy! Scrapbooking is such fun. See you all soon...

Happy Day Layout

Hello browsers, thank you for stopping by.

Using the beautiful papers from MME The Sweetest Thing - Honey collection.  I  decided to scrap a photo of myself my husband took when we arrived in Dubai a few years ago.  I left it out on my work table and I was later horrified to see that water had spilled on it and this had caused the ink to run.  After close examination I decided the photo did not look that bad and realized it could fit in with the look and mediums I intended to use on my layout.

Here is my layout at a glance...


See on the image below how the pink in the ink ran in the photograph...


I layered different patterned papers from the collection and with some bubble wrap and yellow paint added texture before adhering the photograph.  Some of the tile texture is showing in the top corner.  I did a lot of paint dabbing and glimmer mist sprinkling before I started on my design.  Did very little inkling; distressed all the edges of the papers instead.

I chose the page with the bees...here is a snapshot of the page before I started working on it


I thought the pink in the roses picked up the ink in my photograph perfectly and it also finalized my fourth colour which I wanted to add to the black white and yellow theme! I created some texture with the mini tile texture template,  Took some Viva Pink Glimmer Mist and sprinkled its vibrant colour all over the page.


The black and white flower in the top left hand corner was cut with my cameo - I used black and white dotted paper from the DCWV La Creme paper stack.  The bees and 'honeycomb' shapes was my inspiration and I carried this theme forward throughout my layout!


Yellow daisy like flowers with black centers was perfect for this layout and the black glittery swirl added just that hint of elegance. I finger dabbed white paint on all the flowers for additional definition.


I love how the black and white striped ribbon matches with the black and white paper under the photograph - they are from two different collections.  One always steers away from like on like but there are times when it look good - like this time :-)


Black and white patterned paper under the chipboard sentiments further emphasize the black and white scheme in this layout.  Spun a yellow beaded spray across the page and it looks like drops of golden honey.


The chicken wire is a die cut by Dusty Attic.  I cut it into various sizes and adhered it to different places on my page.  When dry I took a toothpick and ran yellow paint along the lines of the shape to create the illusion of honey.  Love the outcome!


I placed a chipboard rose on the exact image on the paper


I used Sun Sisters glimmer mist on the sun template - think it was the perfect touch to this page.


Products Used
MME Sweetest Thing - Honey paper
MME Sweetest Thing - chipboard elements
MME black striped ribbon - Stella Rose 'boy' trims
Dusty Attic - chicken wire 
Mini Tile texture 6x6 template
WR Memory Keepers sew easy floss
Martha Stewart rubby ducky satin craft paint
Sun sisters and Viva Pink glimmer mist
Tim Holtz paper distresser
Black Soot distress ink
White acrylic paint
12x12 chipboard

Non Paperlane Elements
Yellow flowers, black flower lace and centers
tiny white daisies, bees, butterflies and buttons
Sun stencil and yellow beaded string

With beautiful papers and matching embellishments once can create anything.  Paperlane stocks such a wide variety of papers, embellishments, mixed media tools and products, die cuts, etc.  Too many products to mention.  Let the wonderful products sold at Paper Lane inspire you to create beautiful memories.

Until next time...Janine


Thursday, 4 April 2013

Travel Journal


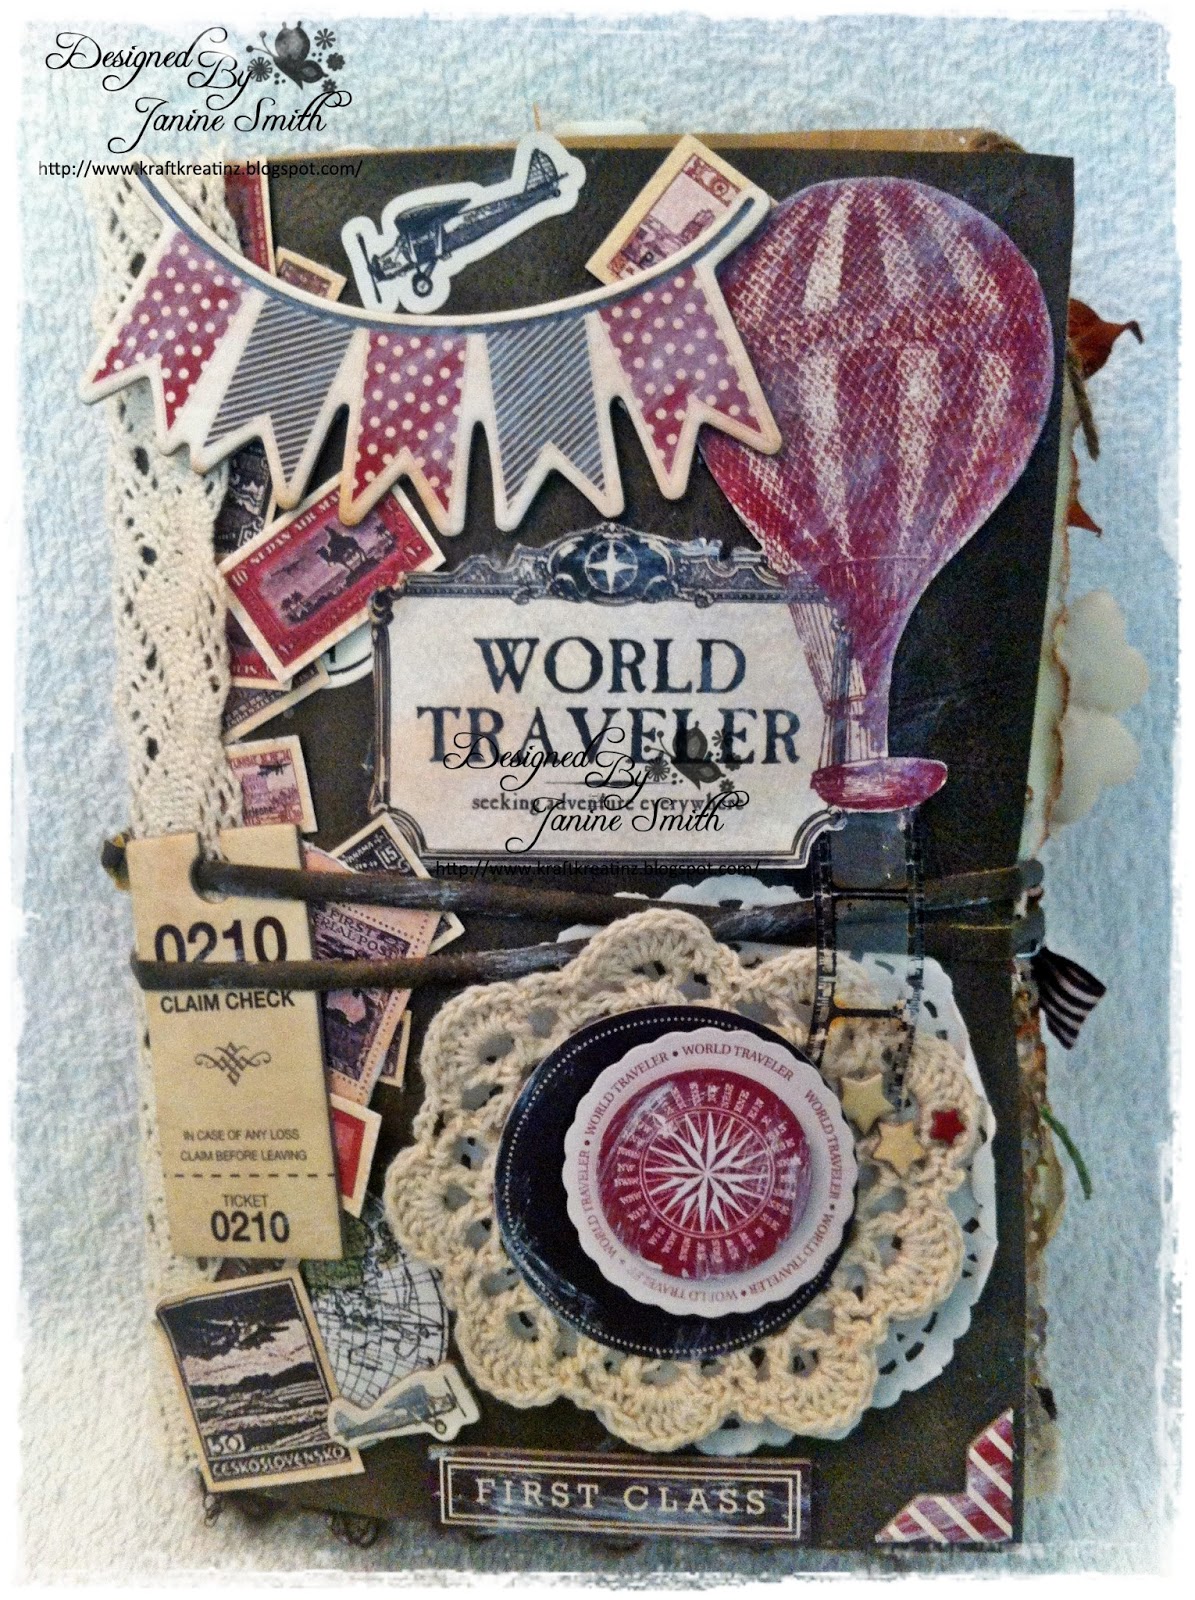
Hey crafty people; today I share with you a travel journal I made using the super awesome World Traveler collection by Carta Bella.  I totally loved the vintage look of this collection and the colours are awesome...rich reds, vintage greens, greys and blacks!  I teamed it with a variety of creme, dark red, brown and kraft card stock - I had the perfect book for it too! With the exception of lace, paper clips and a few bits and pieces Paper Lane stocks everything I used on this project!

Lets take a look at the cover shall we...luckily the cover of the book I used has an old leathery look to it - perfect yes?!  I adhered some beige crochet lace on the spine and a matching doily to help accent the vintage look.  Cut outs from the pages, stickers and chipboard accents complete the look!  I also used a white dabber to create a bit of a worn look.  The leathery strips wrap around the book perfectly securing whatever you have inside.
 I love how bulky the journal is!
For this project I also used from the collection the travel cards, element and alpha stickers, chipboard accents, layered stickers and journaling cards - Paper Lane also stacks the 6x6 paper pad, matching brads and washi tape. I love how this journal turned out - it is totally ready for a vacation - all you have to do is journal daily, collect memorabilia and take oodles of snap shots!
The inside cover reads "packed my bags", it also boasts a map I fussy cut from the paper collection and holds place to insert the flight ticket, boarding passes etc.  Take a photo as you are ready to leave... with your luggage around you and your biggest grin of excitement ever and slip it under the twine on the creme card stock photo mat provided.

There are 14 kraft pages in the journal - each page divided by a creme journaling paper insert - I bought a pad of parchment paper, printed a date space and writing lines and tore and inked the edges with vintage photo distress ink.  I don't know about you but when I go on vacation I love to journal about my day - what we did, saw, ate, etc and to insert any collectibles under a paper clip...see one of my pages below.
There far too many pages in this journal to showcase so I will showcase just a few...enjoy!
I slipped a regular clothing safety pin through the twine of the two tags and adhered to the "get up and go" sentiment before gluing it onto the paper doily - I love the  outcome because the tags lift up, is totally movable, leaving space for a photograph to be admired.  The paper to the left reads the days of the week, is not glued down and slips under the paper clip (good place for the photograph to be slipped under)  I embossed the words relax and travel with white embossing powder.
I found an airmail envelope in my stash, cut it down to size, punched a half circle, inked and added some embellishments   Plus I only adhered it to the left and right so one can easily slide some memorabilia under the top of the envelop  The checkered ribbon on the deep red card stock unties to reveal place for 6 of your favourite snapshots
I left the one side blank for the user to maximize; I have done this on several different locations throughout out the journal.  On the other side I created a double page pocket with the parchment paper and memorabilia can be inserted in on top and in the pocket provided!  The page turns to reveal a double photograph spread on the other side - great way to make usage!
Three photo mats for great snapshots here and it also allows for all kinds of collectibles to be inserted plus the tags are also available for notes or anything you wish to record on it.
The journaling cards in this collection are awesome!  Two of them are tucked under the side flap on the right and are held together with a paper clip.  Each journaling card has a super image with a sentiment and is a post card on the flip side so it could actually be used as a post card for friends on family while you are on vacation!

Imagine taking a journal like this along with you on your next trip??!!  A travel journal makes a better keepsake than a disc of photographs - I mean how often do you take out the disc to look at the photographs??  With a journal like this you can slip it off your shelf and page through the memories whenever you feel like it AND you can show it to your friends and boast about it too.

See you all soon and happy crafting...Janine

Monday, 25 March 2013

Double Zig Zag Card


Hello there curious blog hoppers and followers, it has been a while since my last post.  Apologies, I had a situation and yeah we all know family comes first...but hey am glad to be back crafting!

Have you taken a look at the Heartfelt Creations Paper Pads??  Wow they are awesome awesome awesome!!  I could not choose between the Timeless Amour Collection and the Vintage Floret Collection so I purchased both.  The papers are fabulous!!  Each paper pad has 24 12x12 double sided papers; 2 sheets of each design.  The designs are absolutely beautiful and if it was not for the fact that there are 2 sheets of each design I would horde it because I would not have the heart to cut them.

I made this card for a swap I participated in...the theme of the swap was to make a feminine card but not just an ordinary card...a fancy fold card of your choice.  I decided to make a double zig zag card and because of my bulky rose I made a matching box for it too.

The cover of the box show cases the beautiful rose paper; stunning!  I added some gold glitter to accentuate them.  As I said ladies, these papers are absolutely beautiful!

Box for the card
Side view of the box - yummy lace
Front view of the card
Side view of the card
Back of the card with a tag
Sentiment card from the Vintage Floret Collection

I hope you enjoyed my card using these stunning papers!!  If you live in Dubai pop in at Paper Lane and get some for yourself, you will not regret it!


Sunday, 27 January 2013

Altered notebooks and a tag

As you all know besides making mini albums, I love to alter things.  Recently I have altered two notebooks and also decorated the pages making it a semi smash book/journal of sorts.

Here is the first one and it was part of a swap...


The image above and below are taken with different backgrounds and angles. 


I love love this journal!  I used Webster's Pages for the cover with lots of lace and flowers.  There are several charms too.  The black and white tag is a pull out and the alphabet is by XXX

I made another using A Ladies Diary and this time I made a tag too..........


I love the lace on the edge of the journal above and the lace flower below!


The images above and below are of the inside of the cover of the journal.


Just look at that tea pot!  This collection is awesome!


The above tags slide in the pocket and below is close up


The images above and below are but 2 of the many pages inside the journal


The above image is the back of the journal


The tag I created for this journal


I love the little pink dress on a hanger charm - suits this tag perfectly!


A Tim Holtz dress form, metal flower and lock with key are some of the elements on this tag.


Fussy cutting with this collection is amazing; adds so much more to your project!